There are two steps to set up your camera settings. Please note that unless the step 1 is completed, we can not do the step 2:
Setp1: Complete your camera setup through the touch screen. Please check this article: how-to-pair-cameras-from-s3s-touch-screen
Step2: Set up the camera preferences and detection zone boundaries from the dashboard:
Warning: To ensure that the settings are applied correctly, first ensure that the camera is plugged in and the system is turned ON and working. This feature will not work if the camera is not plugged in. It may take up to 2 minutes for the settings update to get pushed to your devices once saved on the dashboard.
At a high level, setting up the S3 camera involves the following steps:
- Login to the dashboard.
- Navigate to camera settings page.
- Select the camera which we want to set up
- Set up camera preferences
- Define the Near-miss detection region
Now we dive into each step in detail.
Navigate to the camera settings page
- Login to the dashboard using account admin/owner login credentials and click on “System Settings” in the “Settings” drop down found in the left hand side navigation menu. Following screen will appear:
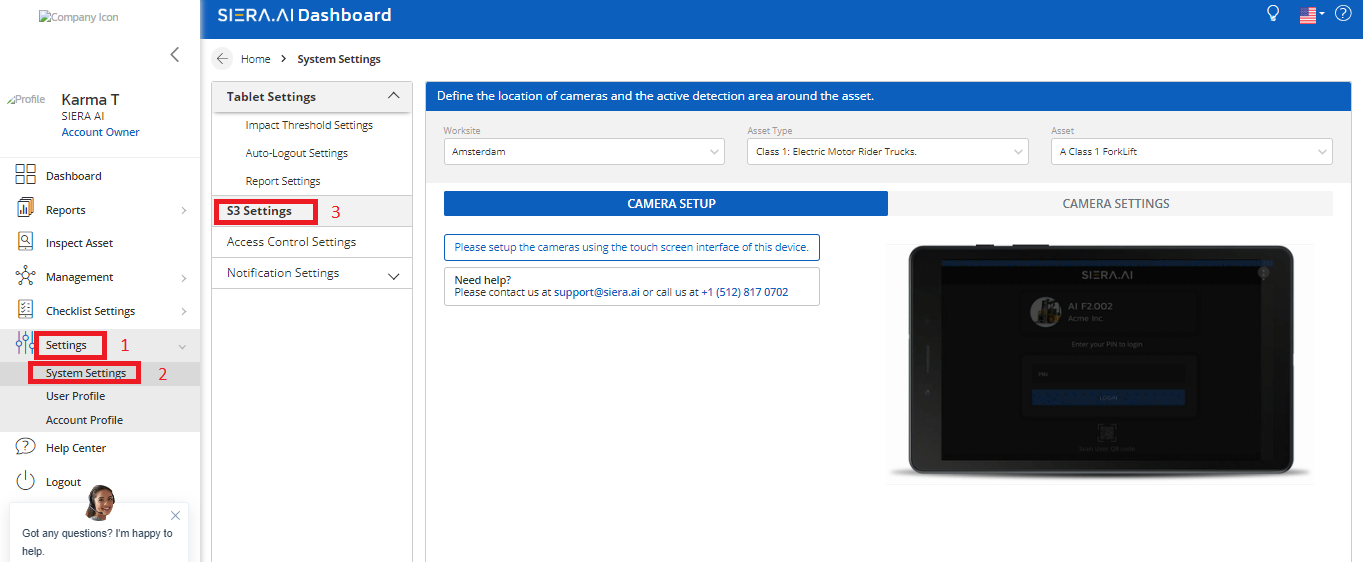
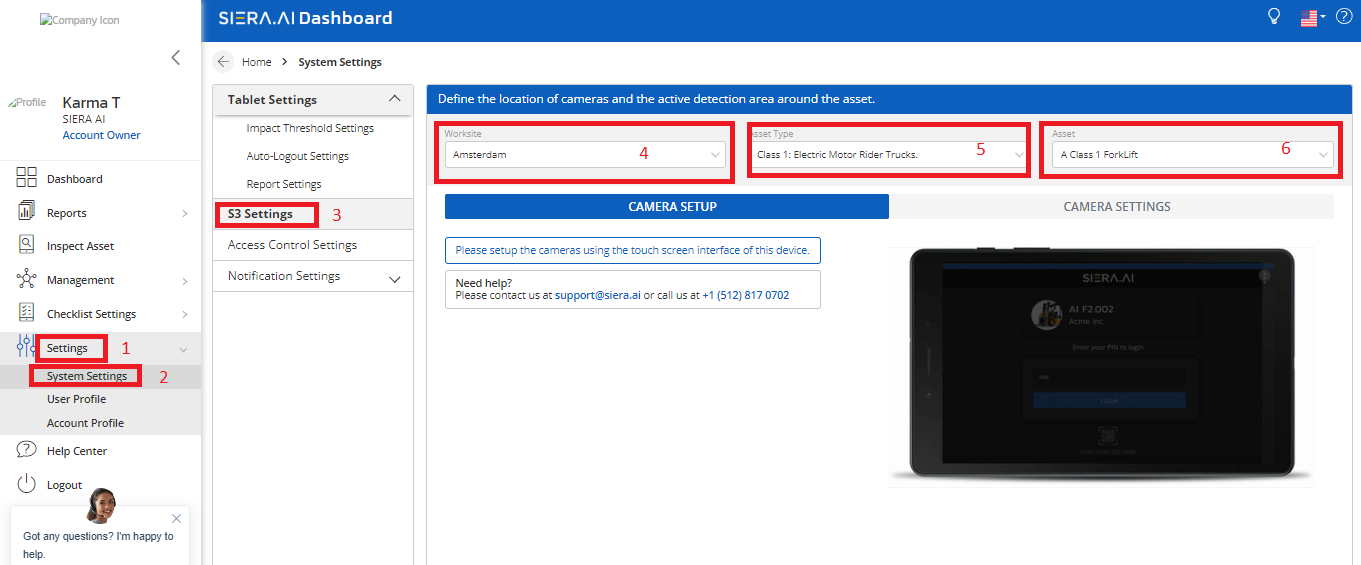
- Click on the S3 Settings tab (3)and select the worksite(4), Asset type(5) and Asset(6) from the dropdowns. The settings that we configure would get applied to the selected asset of that particular asset type on that selected worksite.
-
Select the camera which we want to configure
- Make sure that the “Camera Settings”(1) Tab is selected as shown below
- S3 systems having both rear and front cameras.Select the rear camera from the Camera position (2) down drop as shown below

-
Set up camera preferences
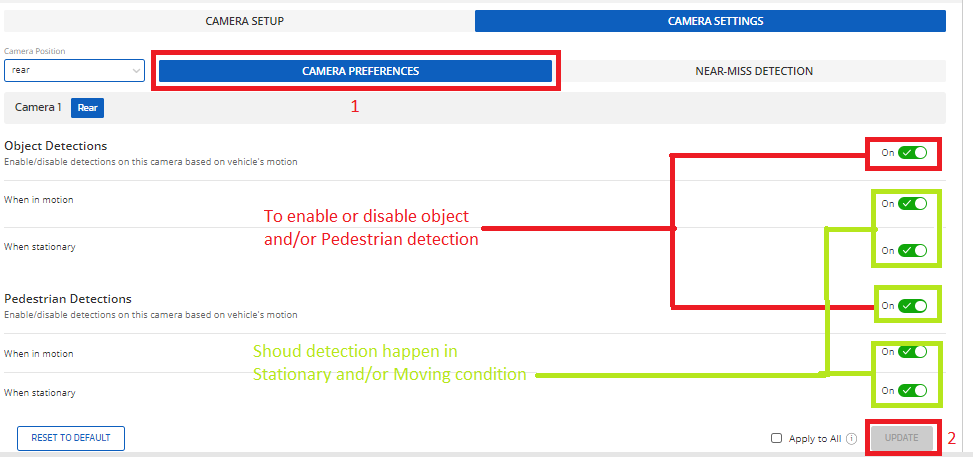
- Make sure that the “Camera preferences(1)” tab is selected.
- Here we can enable or disable the Pedestrian and object detection by the toggle switches as shown in the picture.
- We can also set up whether the object and/or pedestrian detection should happen in a stationary and/or moving state.
- Please hit “Update(2)” to save your preferences
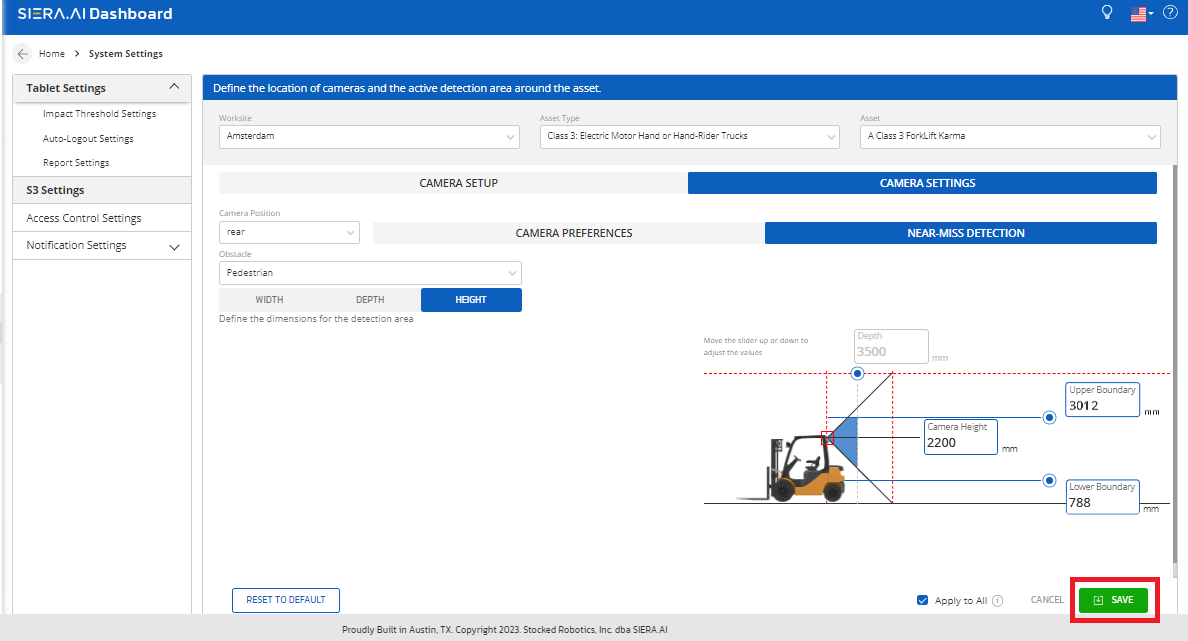
Defining the near-miss detection region
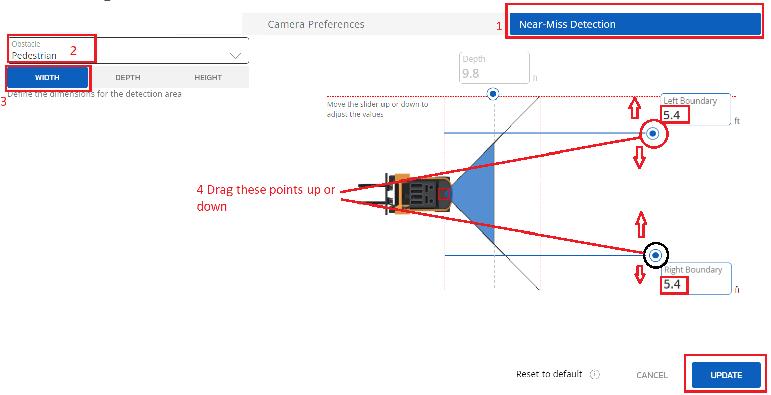
- To define the region within which the presence of an Object or a pedestrian should be considered a near miss, we set up three parameters for Object and Pedestrian each. They are:
- Width: The right and left boundaries of the camera’s peripheral vision
- Depth: The distance from the camera upto which presence of an object or pedestrian would be deemed dangerous.
- Height: The upper and lower boundaries of the camera’s vision
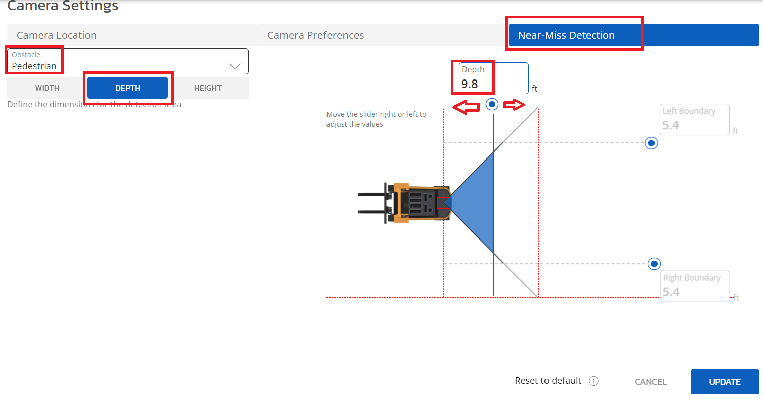
- Make sure that “Near-Miss Detection(1)” tab is selected.
- Select the type of obstacle (Object or pedestrian)(2) from the drop down
Defining width: - Click on the Width tab(3) and slide the boundary line to set up the boundaries. We can also enter the numeric value of the distances instead of sliding.
Defining Depth:
- Click on the Depth tab and slide the boundary away or towards the camera to set the distance. We can enter the numeric value of distance in the text box instead of sliding.
- Hit the update button at the bottom right
Defining Height:
- Click on the Height tab(1)
- Measure the camera’s height from ground and enter it in the box indicated for camera height from ground
- Slide the boundaries up or down to set up the limits of the camera's upper and lower vision, alternatively, type in the numeric values in the boxes
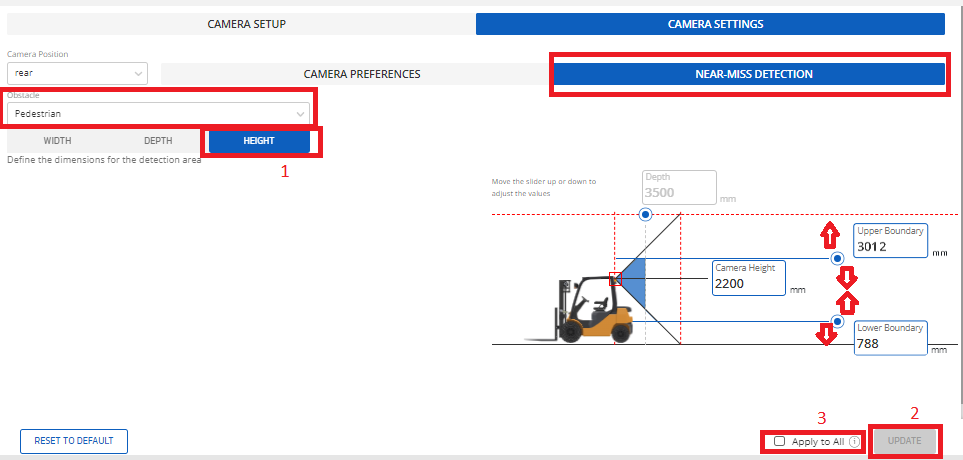
- Click update(2)
- Change the Obstacle type from the drop down menu and set up the Width, Depth and Height for the other obstacle type
- Don’t forget to save your settings by clicking the update button
- If you want to copy the above setting to all the assets or few of the asset.Need to click on Apply to all(3) as shown above.
- Once you click on Apply to all the below pop up will show up:
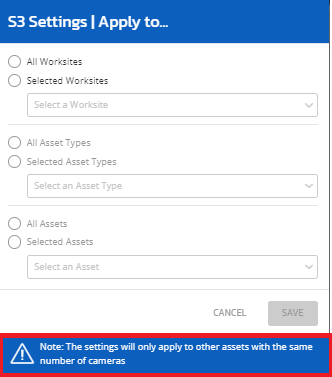
- From the above pop up you need to select the relevant worksite,asset types and asset to which you need to copy the settings to as shown below and hit Save
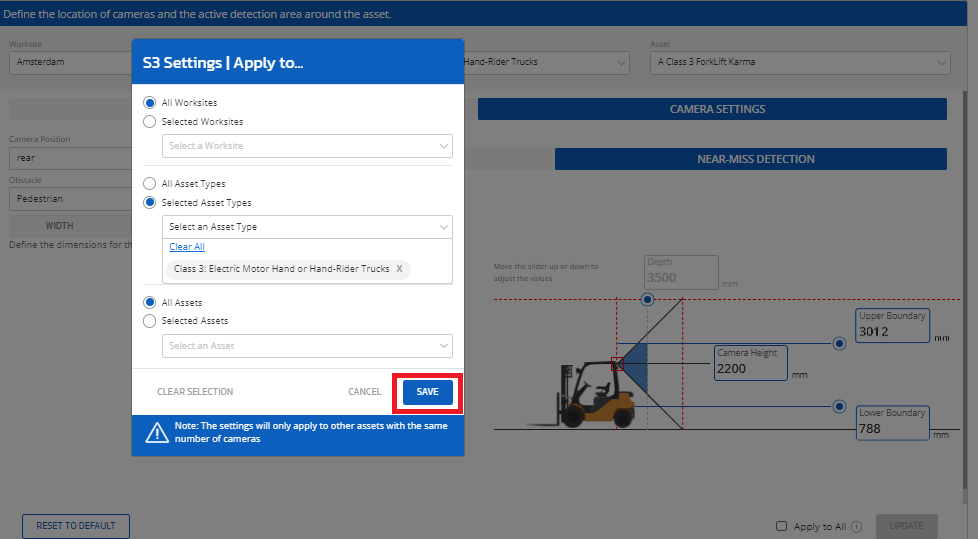
- Once you hit save the screen would look like as below:Kindly hit save as shown to save the setting to the selected assets of Apply to all:-
- We hope you found this article useful. If you need help, please call us at +1-512-817-0702 or email us at support@siera.ai.