Note: Please make sure that the tablet is connected to a power source when you start the factory reset on the tablet.
- Once the factory reset is initiated by the SIERA.AI agent, the device would erase the existing content and reboot the device.(Disclaimer:Kindly don't factory reset the tablet yourself)
- You’d now see a Welcome Screen(as shown below). Press Start

- You will now see “A few legal items to review”. Select “I have read and agree to all of the above” and click NEXT.

- Now you need to pair to a Wifi network. SIERA.AI tablets can work with Cellular connection. If the cellular connectivity is good in your facility, you can choose to skip this step, otherwise, go ahead and pair it with your facility's Wi-Fi netwrok but dont forget to take an approval from your IT team.
-jpeg.jpeg)
- You will see “Getting your tablet ready…”. Wait until you see the next screen.
- Now the tablet will ask you for “Copy apps and data”. Click Don’t Copy
-jpeg.jpeg)
- It will now ask you for a Google ID. Click Skip
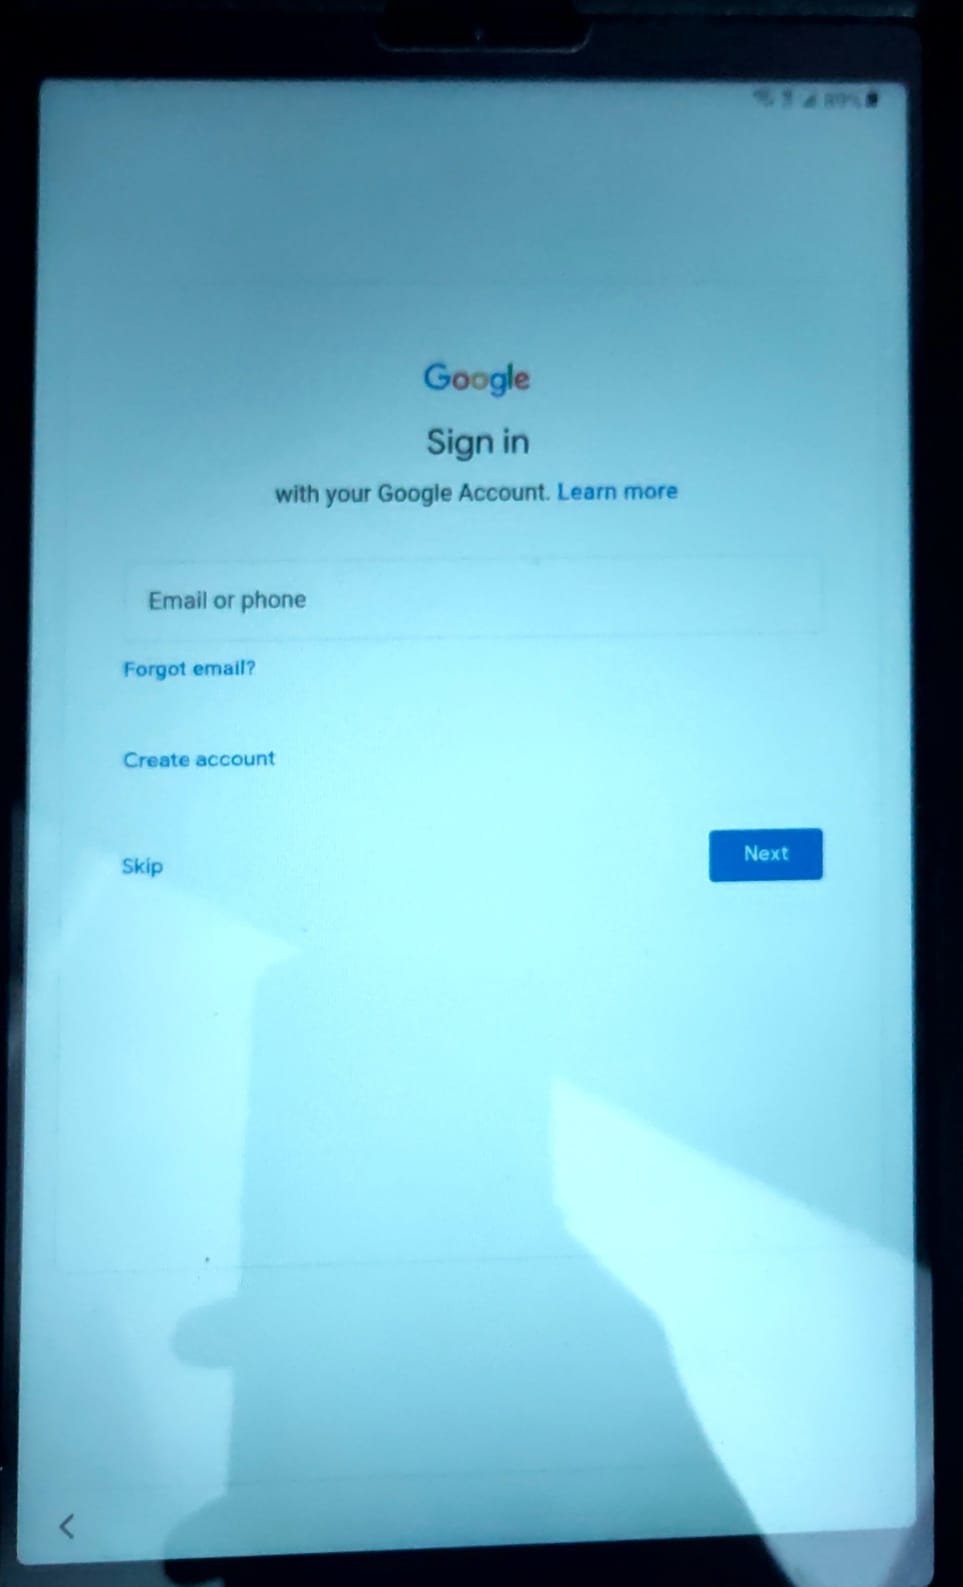
- It will ask you to confirm skipping. Click Skip again
-jpeg.jpeg)
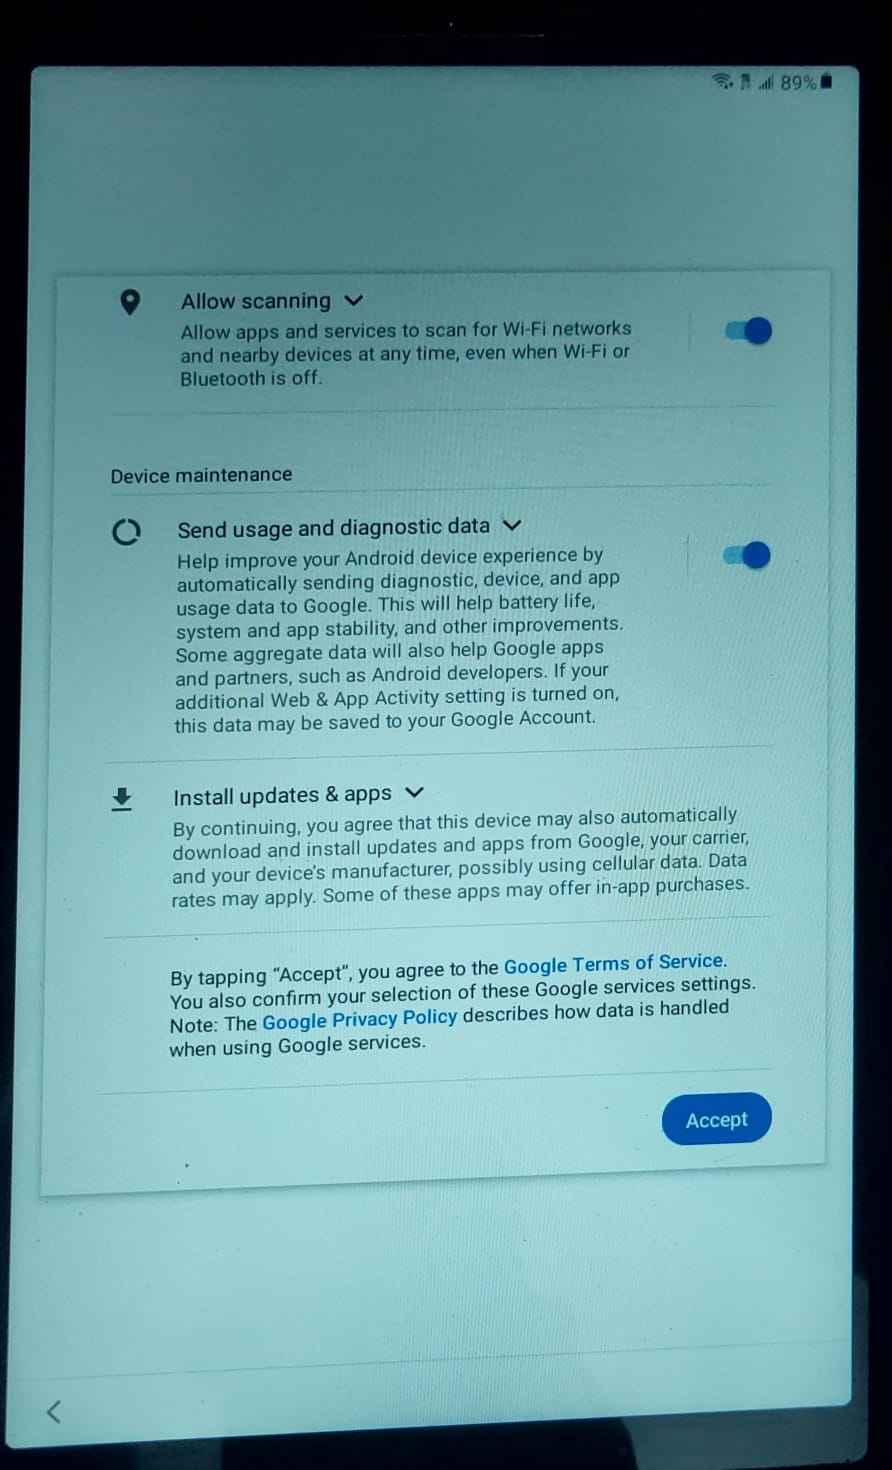
- You will now see “Google Services” screen. Let everything be ON and click Accept at the bottom.
- Now it will ask you to “Protect your Tablet”. Click Skip.
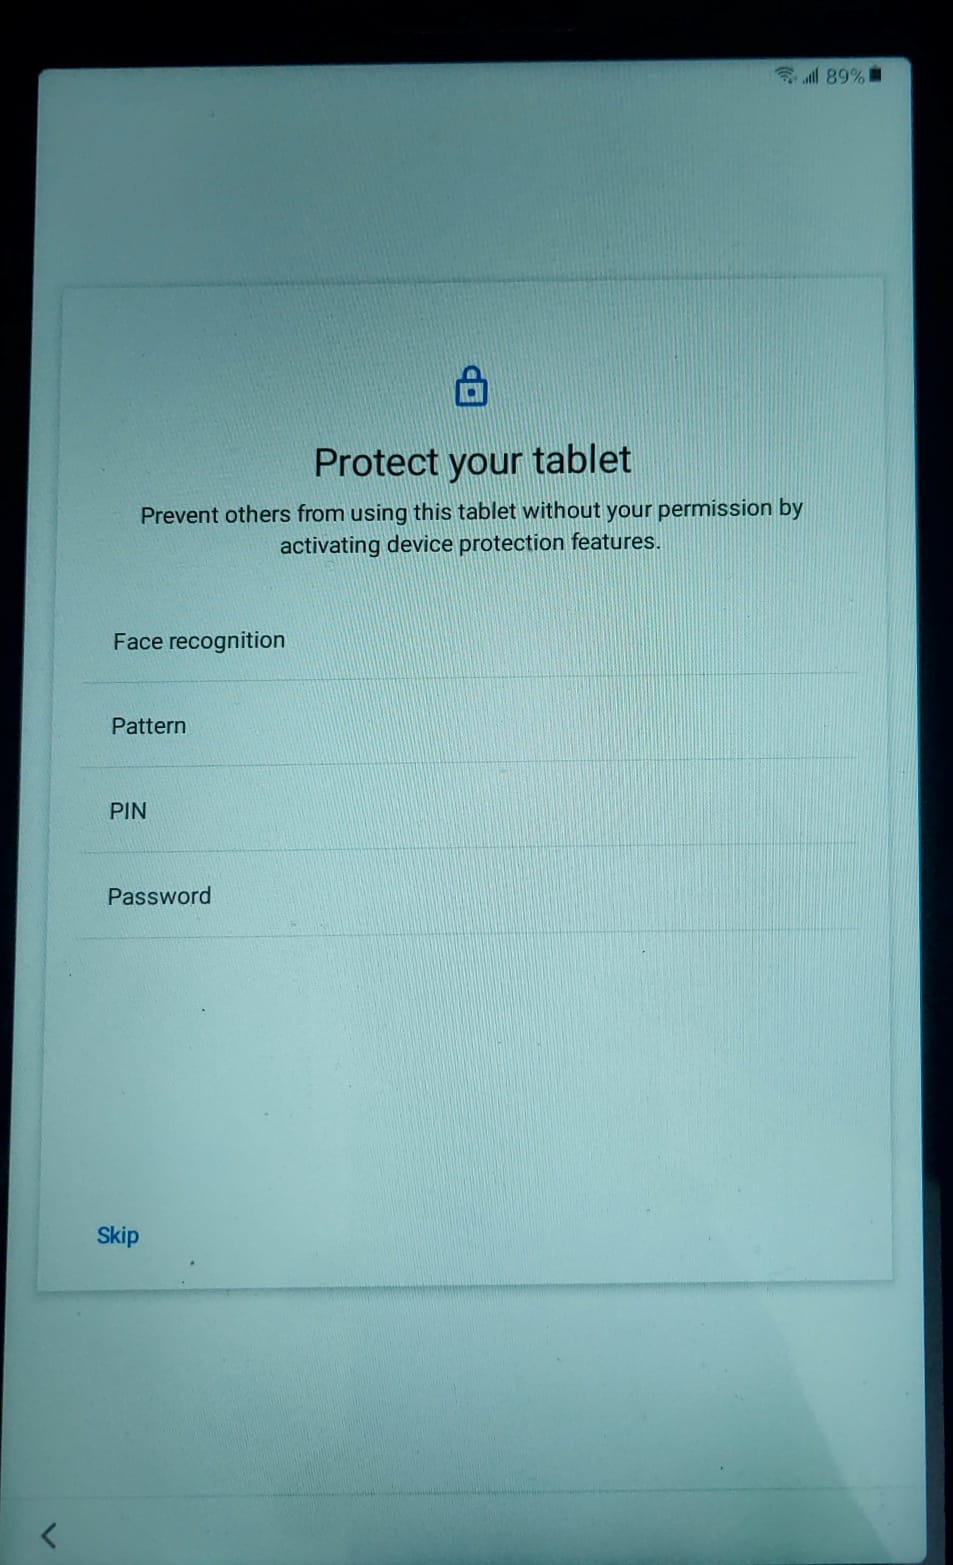
- It will ask you to confirm the action. Click Skip Anyway.
-jpeg.jpeg)
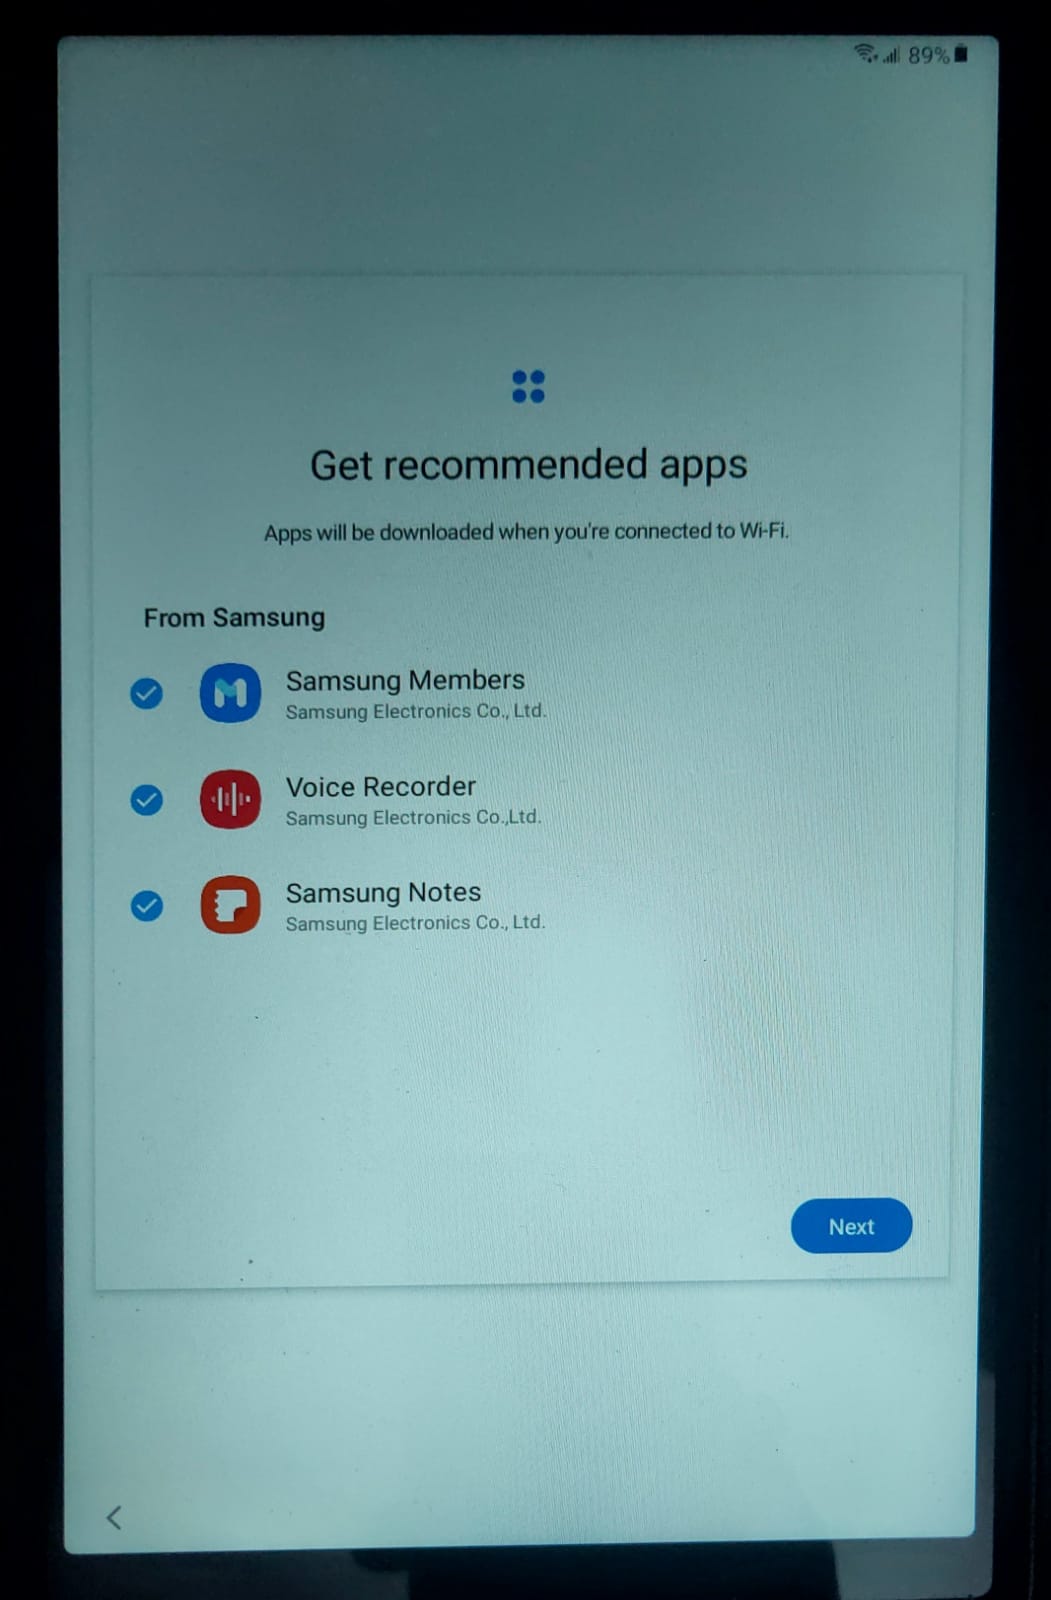
- Next it will ask for get recommended app and review additional app.You can skip or uncheck the apps and proceed forward.
-jpeg.jpeg)
- In OS14 it will take you to the following step, where you need to click "Forgot password or don't have an account and on next screen click "SETUP LATER.

- On OS 13, Samsung will ask you to sign up. Click Skip
-jpeg.jpeg)
- Confirm your action. Click Skip
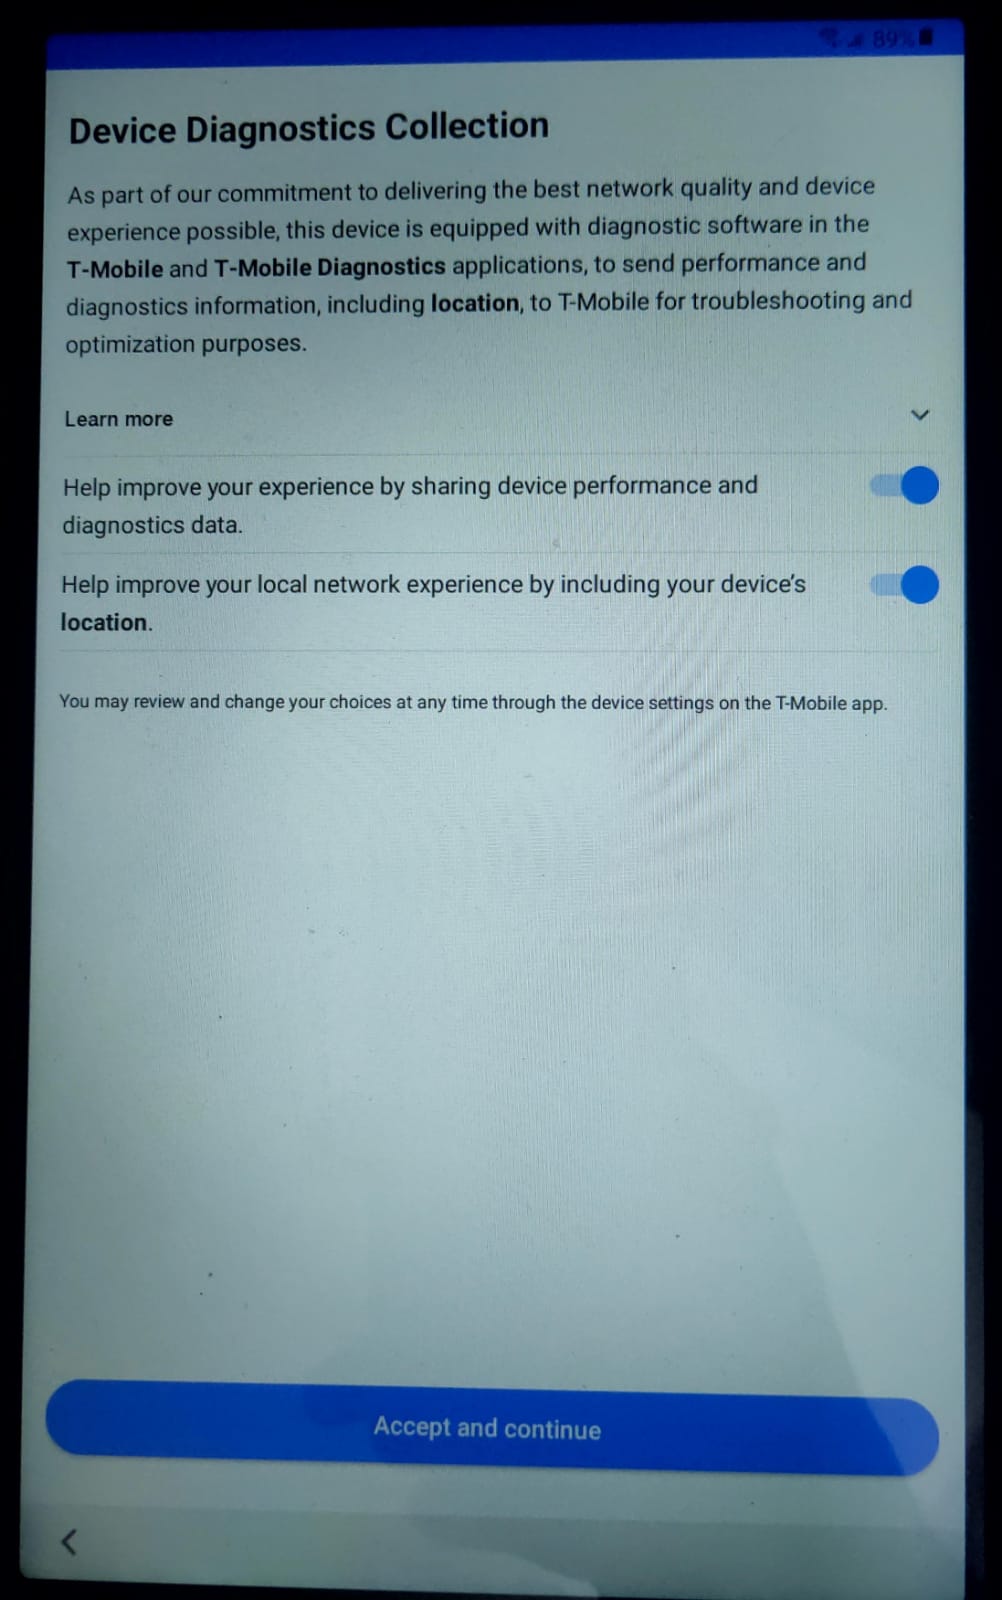
- Now you will see screen for device diagnostics collection and device diagnostics data turn ON both the steps and proceed
-jpeg.jpeg)
- You will finally see “You’re all set up!”. Click Finish
-jpeg.jpeg)
- You will now reach the Home screen of the Samsung tablet.
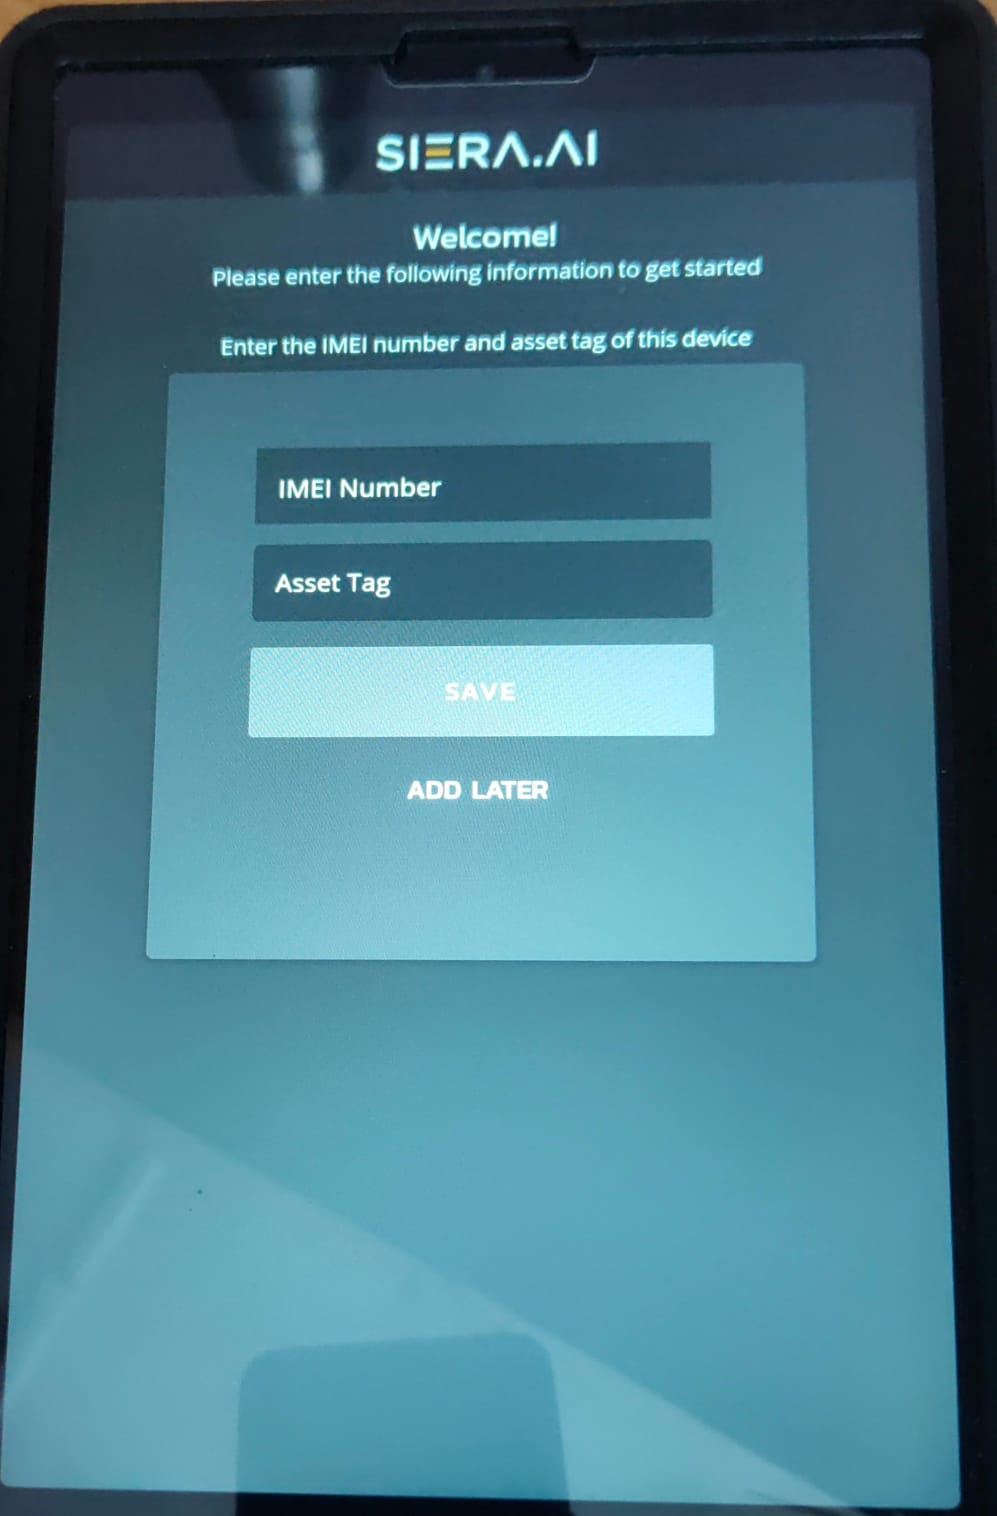
- Once it finishes the setup after it will take you to the screen where you need to add IMEI and Tag number and hit"Save". Click on Save (see attached reference image)
- A white screen will appear with “Please wait”.
- Then the Knox Configure Enrolment will start. Press Next at the bottom right corner of the screen (Please Note: It may take up to 2minutes for this process to initiate)

- There’d be terms and conditions to review. Press Agree
-jpeg.jpeg)
- The enrolment process will first Authenticate, then it will Download the Scout application. No inputs required here.
- Once the application is downloaded and installed the tablet will bring you to “Change System Settings” screen. You will need to provide permission to Scout. Turn ON the switch and press the back arrow.
-jpeg.jpeg)
- You will now come to “Appear on top” screen. Provide permission to Scout. Turn ON the switch and press the back arrow.
-jpeg.jpeg)
- The Scout application will load up and take you to the login screen.
-jpeg.jpeg)
- Enter the login credentials and assign the device to the tablet using the embedded article:How to assign a device to tablet
We hope this article was useful.For any further queries,kindly contact us at support@siera.ai or call us at +1 (512) 817 0702